I’ve been on an art kick working on my most recent side project, an RTS made in Unity. In this post, I want to share some neat things I’ve been doing with shaders.
Note that this is an area I’m still exploring and learning in. These are just the results of some of my first experiments. If you have ideas on how to improve them, please leave me a comment at the end of the post.
UV scrolling (Tank treads)
Moving tank treads were a bit of a mystery to me at first. A first solution might be to deform the mesh along a path, but it’s pretty hard to define the path along which the mesh will deform.
Instead, there’s a much cheaper way to get a nice-looking tank tread effect. Instead of moving the mesh, we’ll move the UV coordinates of each vertex. That way, the texture beneath will move, but the mesh itself won’t have to change. In effect, the mesh itself defines the path.
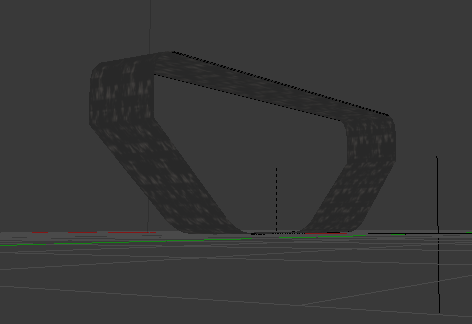
Here’s my simple model for the tread, modelled in Blender:

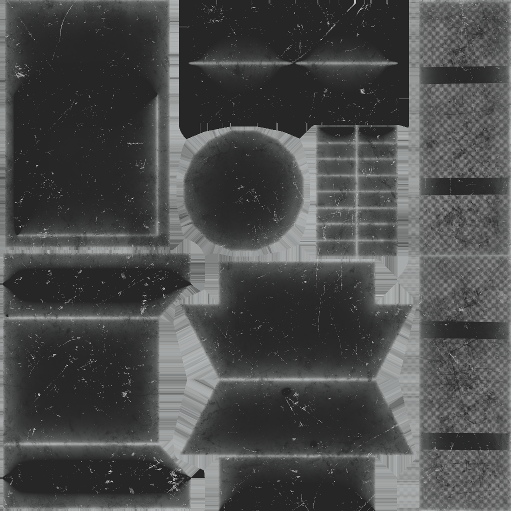
I unwrapped the model in a straight line, extending off the edges of the texture:
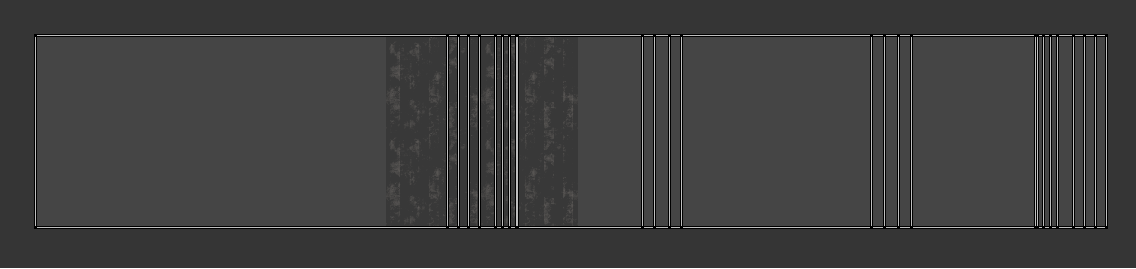
Note: image rotated 90 degrees so it looks nicer in the post.
With this UV layout, the texture tiles across the tread model. Why? Because UV coordinates outside of the [0,1) range wrap back onto the texture.
To make it move, we turn to a surface shader with a vertex shader component. The vertex shader is quite simple:
UNITY_INSTANCING_CBUFFER_START(Props)
    UNITY_DEFINE_INSTANCED_PROP(float, _Scroll)
UNITY_INSTANCING_CBUFFER_END

void vert(inout appdata_full v) {
    v.texcoord.y += UNITY_ACCESS_INSTANCED_PROP(_Scroll);
}
Note that we’re taking advantage of GPU instancing, about which I won’t go into full detail here. Essentially, it allows us to pass different data to the same material without duplicating the material itself. UNITY_DEFINE_INSTANCED_PROP is defining a variable, _Scroll, which is getting passed in from a script:
public float treadScrollSpeed;
public Renderer[] treadRenderers;

private float scroll = 0.0f;

void Update()
{
    if (rb.velocity.magnitude > 0)
    {
        float offset = treadScrollSpeed * Time.deltaTime;
        scroll += offset;

        foreach (Renderer renderer in treadRenderers)
        {
            renderer.GetPropertyBlock(scrollPropertyBlock);
            scrollPropertyBlock.SetFloat("_Scroll", scroll);
            renderer.SetPropertyBlock(scrollPropertyBlock);
        }
    }
}
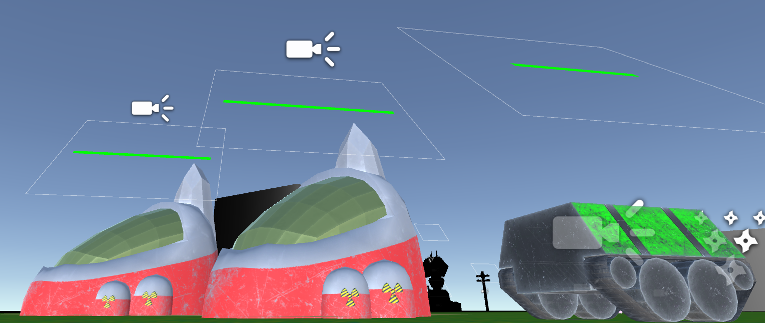
Here’s the final effect we achieve. Note that I’ve applied a normal map as well to get the bumpy effect.
Mesh morphing (Target indicator)
In Starcraft 2/Warcraft 3, there’s a simple animation that plays at your cursor whenever you issue a command targeting the ground. It looks something like this:
There are a couple of ways to achieve this effect. The most straightforward way would be to change mesh vertices every frame in a C# script. However, doing this actually creates a new mesh every frame and sends it to the GPU. For a small-scale animation like this, it might not matter too much, but at the same time I didn’t want to make an inefficient solution just for the sake of saving time.
I ended up going with a sine wave deform in the vertex shader. I started by making this subdivided plane, textured with an arrow:
![]()
Then, I wrote a surface shader with alpha cutoff (to preserve the transparent parts of the arrow texture) and a vertex shader component. Here’s a snippet of that surface shader:
// Note the alphatest and vertex parts of this pragma
#pragma surface surf Standard alphatest:_AlphaCutoff vertex:vert

// ... some parameters here

UNITY_INSTANCING_CBUFFER_START(Props)
    UNITY_DEFINE_INSTANCED_PROP(float, _TimeSinceInstantiation)
UNITY_INSTANCING_CBUFFER_END

void vert(inout appdata_full v) {
    float time = UNITY_ACCESS_INSTANCED_PROP(_TimeSinceInstantiation);
    float lerp = frac(time / _LerpTime);
    v.vertex.z += _Length * lerp;
    v.vertex.y += sin(v.vertex.z * 3.14 / _Period) * _Height;
}
Note that v.vertex.z contains the model-space coordinate of the vertex; I took advantage of this by placing the origin of the mesh at the base of the arrow, so that the sine wave begins at the ground.
We’re using GPU instancing again, this time for passing in the time since instantiation of the arrow using a script similar to that above for the scrolling. At first, I tried taking advantage of the built-in Time shader input and passing in the time of instantiation just once. However, I ran into problems in the standalone build, where it seemed that the two were out of sync. Still, passing in a single float is better than multiple Vector3s every frame.
Here’s the end product in game-view:
Alpha-to-color (Player colorization)
Originally, to show player colors on our units, we were applying different materials to the parts that we wanted colored differently, then tinting those materials. This means we needed at least two materials per unit, with all the overhead that would bring.
To remedy this, we create a new texture map for the player color. It operates a bit like a mask - white means “show the regular texture”, black means “show the player color”. Here’s the albedo (base color) map alongside the player color map for the worker:
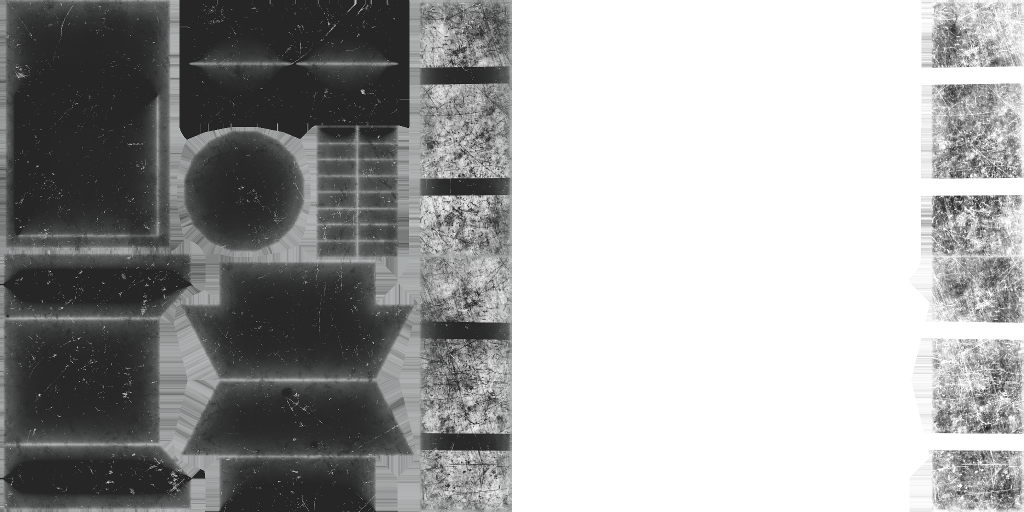
Ignore the edge artifacts between UV islands
We can do slightly better, though, by combining the two maps into one. For most units, the alpha channel of the albedo texture will be unused. Since the player color map is grayscale, we can merge these two textures into one by using the alpha channel of the albedo as the player color map:
An alpha of 1 means that player color is shown fully, and an alpha of 0 means that the base color shows fully.
Now, in the shader, we take the player color as an input, sample the albedo map, and blend the rgb value with the player color depending on the alpha:
Properties {
    _PlayerColor ("Player Color", Color) = (0,0,1)
    _AlbedoTex ("Albedo", 2D) = "white" {}
    _MetallicTex ("Metallic", 2D) = "white" {}
    _Smoothness ("Smoothness", Float) = 1.0
    [Normal] _NormalTex ("Normal", 2D) = "white" {}
    _OpacityTex ("Opacity", 2D) = "white" {}
}
SubShader {
    Tags { "RenderType"="Opaque" }
    LOD 200

    CGPROGRAM
    #pragma surface surf Standard fullforwardshadows
    #pragma target 3.0

    sampler2D _AlbedoTex;
    sampler2D _MetallicTex;
    sampler2D _NormalTex;
    sampler2D _OpacityTex;

    half _Smoothness;

    struct Input {
        float2 uv_AlbedoTex;
    };

    UNITY_INSTANCING_CBUFFER_START(Props)
        UNITY_DEFINE_INSTANCED_PROP(fixed3, _PlayerColor)
    UNITY_INSTANCING_CBUFFER_END

    void surf (Input IN, inout SurfaceOutputStandard o) {
        fixed4 albedo = tex2D (_AlbedoTex, IN.uv_AlbedoTex);
        fixed4 metallic = tex2D (_MetallicTex, IN.uv_AlbedoTex);
        fixed3 normal = UnpackNormal (tex2D (_NormalTex, IN.uv_AlbedoTex));
        float opacity = tex2D (_OpacityTex, IN.uv_AlbedoTex);

        // We use albedo alpha as a playercolor map
        float pColorSample = albedo.a;

        // Blend the player color with the albedo RGB
        o.Albedo = pColorSample * albedo.rgb + (1.0 - pColorSample) * UNITY_ACCESS_INSTANCED_PROP(_PlayerColor);

        // Map the rest of the regular surface shader outputs
        o.Normal = normal;
        o.Metallic = metallic.r;
        o.Smoothness = metallic.a * _Smoothness;
        o.Alpha = opacity;
    }
    ENDCG
}
FallBack "Diffuse"
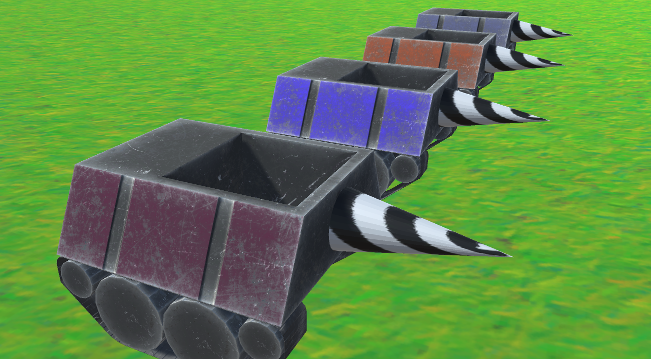
Here’s the final result for the worker model, using some random color inputs for the player color:
Drill model/texture temporary! I’m still working on it…
Conclusion
I’m never going to be as good as a real artist, but merging my strong suits (programming) with my weaker ones (art) makes things a lot more fun. I’m learning a lot about different tricks and techniques to make the game look and feel better, but there’s so much more yet to learn. I may end up replacing some of these tricks as I learn more, and I will post updates as I do.