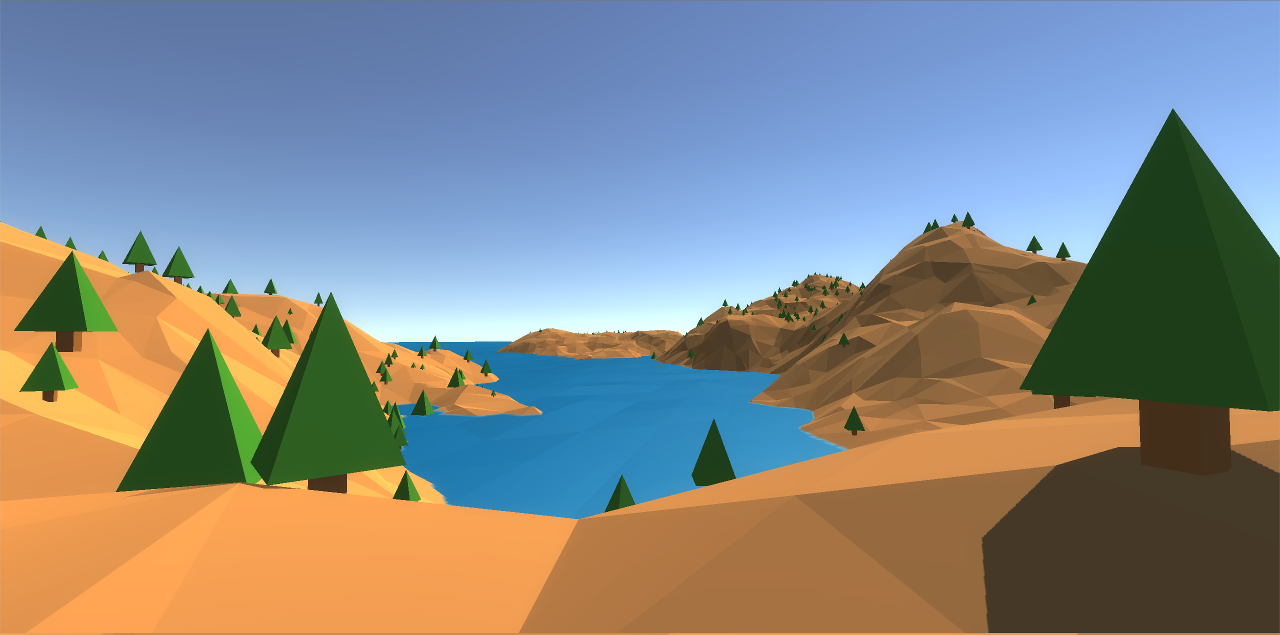
Lately, I’ve been working on a multiplayer dogfighting game in Unity. While I could have just had players fight over a flat blue ocean, I felt like the levels needed something more. Inspired by my previous experiments in terrain generation, I generated a perlin noise heightmap, and then created a mesh using regularly spaced points.
However, I felt like the terrain was… well, rather bland. I went searching for inspiration around the internet, and the one that really stood out to me was Woodbot Pilots. In some places, their triangles are huge, suggesting slabs of rock and towering cliffs. In other places, small triangles hint at crevices and finer detail. I didn’t fool myself into thinking I could achieve such a detailed result with procedural generation, but perhaps I could get close by using irregularly-spaced points, rather than points on a grid.
Back in Feburary 2015, I used amitp’s tutorial on voronoi cells to create terrain for a small tactics game. The terrain in that game looked kinda like what I needed, but in 2d. I set about trying to use voronoi cells to procedurally generate a mesh in Unity. In this post, I’ll go over the initial part of generating the triangulation and translating that into a mesh.
Generating a Delaunay Triangulation
To be honest, I’m not that familiar with the actual definition of a Delaunay Triangulation and, its close counterpart, the Voronoi Diagram. For a decent overview, I’ll point you again to amitp’s article I linked just above.
For our purposes, all you really need to know is that a delaunay triangulation takes a set of vertices as an input, and spits out a set of triangles as output. The triangles themselves form a mesh; the edges from one vertex to another do not cross.

I chose not to implement the triangulation myself. I went through a survey of several available third-party libraries, and finally settled on Triangle.NET. Before you go and download it, there are a couple of things you should know:
- I directly cloned the repository and included the source in my project, rather than using the available binaries - a lot of work has been done on the library since the last release.
- It does not compile cleanly under Unity because Unity is stuck on some really old version of C#. You’ll need to fix the issues as described in these two stack overflow posts: Convert List of DerivedClass to List of BaseClass and String IsNullOrWhiteSpace.
If you don’t want to deal with any of that, I’ve pushed the demo source for this post to github. You can just copy the entire TriangleDotNet directory into your own project, but remember it might be outdated by the time you read this post!
Once we get Triangle.NET compiling, we can start leveraging its Delaunay Triangulation implementation. To start with, we’ll need to create a TriangleNet.Geometry.Polygon. Despite its name, it doesn’t actually need to be a polygon - it can just be a bunch of points.
// Vertex is TriangleNet.Geometry.Vertex
Polygon polygon = new Polygon();
for (int i = 0; i < randomPoints; i++) {
    polygon.Add(new Vertex(Random.Range(0.0f, xsize), Random.Range(0.0f, ysize)));
}
After we fill the polygon, Triangle.NET makes it super easy to triangulate the points:
// ConformingDelaunay is false by default; this leads to ugly long polygons at the edges
// because the algorithm will try to keep the mesh convex
TriangleNet.Meshing.ConstraintOptions options =
    new TriangleNet.Meshing.ConstraintOptions() { ConformingDelaunay = true };
TriangleNet.Mesh mesh = (TriangleNet.Mesh)polygon.Triangulate(options);
The resulting TriangleNet.Mesh object has several important fields: mesh.vertices, which are just the points you passed in from the Polygon; mesh.edges, which are the lines between each vertex; and mesh.triangles, which are the triangles made up of each of those edges.
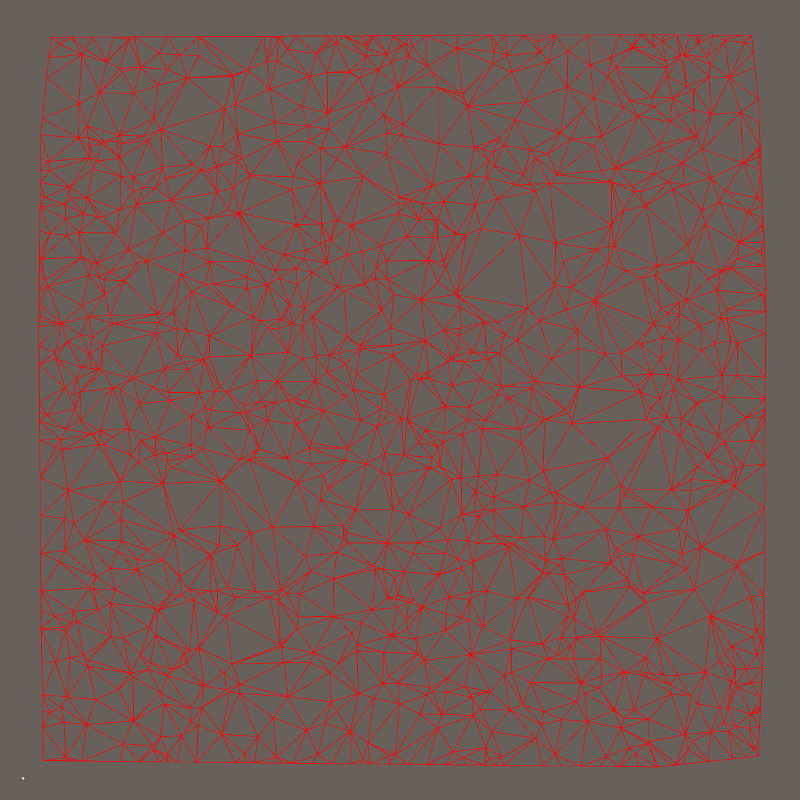
At this stage, we can visualize the mesh object using gizmos in Unity, just to take a look at what we have:
public void OnDrawGizmos() {
    if (mesh == null) {
        // We're probably in the editor
        return;
    }

    Gizmos.color = Color.red;
    foreach (Edge edge in mesh.Edges) {
        Vertex v0 = mesh.vertices[edge.P0];
        Vertex v1 = mesh.vertices[edge.P1];
        Vector3 p0 = new Vector3((float)v0.x, 0.0f, (float)v0.y);
        Vector3 p1 = new Vector3((float)v1.x, 0.0f, (float)v1.y);
        Gizmos.DrawLine(p0, p1);
    }
}
If you hit play, then pause, you should see something like this:
Generating a 3D mesh
At each of the vertices of the delaunay triangulation, we want to get some sort of elevation. A commonly used algorithm for generating terrain heightmaps is 2D Perlin Noise, which is what I’ve used.
Unity has its own implementation of 2D perlin noise which is good enough. You need to do a little work to get nice-looking terrain out of it. Perlin noise sampling is a huge topic on its own, so I’ll refer you again to amitp and his excellent tutorial on the subject. For completeness, here is my perlin noise sampling code:
// Sample perlin noise at each generated point to get elevation and store it in
// the elevations array
foreach (Vertex vert in mesh.Vertices) {
    float elevation = 0.0f;
    float amplitude = Mathf.Pow(persistence, octaves);
    float frequency = 1.0f;
    float maxVal = 0.0f;

    for (int o = 0; o < octaves; o++) {
        float sample = (Mathf.PerlinNoise(seed[o] + (float)vert.x*sampleSize / (float)xsize * frequency,
                                          seed[o] + (float)vert.y*sampleSize / (float)ysize * frequency) - 0.5f) * amplitude;
        elevation += sample;
        maxVal += amplitude;
        amplitude /= persistence;
        frequency *= frequencyBase;
    }

    elevation = elevation / maxVal;
    elevations.Add(elevation);
}
Now we need to use these sampled elevations, together with the 2D points in the delaunay mesh, to generate a Unity gameObject. There are two things to keep in mind here.
- One vertex can participate in many triangles. However, making a mesh with shared vertices like this will result in a smoothly-shaded mesh. My goal was to create flat-shaded terrain, so each triangle needs its own set of three vertices.
- Because of that, the vertex count in the mesh will quickly balloon. Unity only supports up to 65000 vertices in any given mesh, so for larger terrains, we need to split the mesh up into chunks.
Here is the code for the mesh generation. It’s a bit verbose, but it isn’t very complex. Remember that all we’re doing is translating triangles from Triangle.Net into a format that Unity understands.
public void MakeMesh() {
    // Instantiate an enumerator to go over the Triangle.Net triangles - they don't
    // provide any array-like interface for indexing
    IEnumerator<Triangle> triangleEnumerator = mesh.Triangles.GetEnumerator();

    // Create more than one chunk, if necessary
    for (int chunkStart = 0; chunkStart < mesh.Triangles.Count; chunkStart += trianglesInChunk) {
        // Vertices in the unity mesh
        List<Vector3> vertices = new List<Vector3>();

        // Per-vertex normals
        List<Vector3> normals = new List<Vector3>();

        // Per-vertex UVs - unused here, but Unity still wants them
        List<Vector2> uvs = new List<Vector2>();

        // Triangles - each triangle is made of three indices in the vertices array
        List<int> triangles = new List<int>();

        // Iterate over all the triangles until we hit the maximum chunk size
        int chunkEnd = chunkStart + trianglesInChunk;
        for (int i = chunkStart; i < chunkEnd; i++) {
            if (!triangleEnumerator.MoveNext()) {
                // If we hit the last triangle before we hit the end of the chunk, stop
                break;
            }

            // Get the current triangle
            Triangle triangle = triangleEnumerator.Current;

            // For the triangles to be right-side up, they need
            // to be wound in the opposite direction
            Vector3 v0 = GetPoint3D(triangle.vertices[2].id);
            Vector3 v1 = GetPoint3D(triangle.vertices[1].id);
            Vector3 v2 = GetPoint3D(triangle.vertices[0].id);

            // This triangle is made of the next three vertices to be added
            triangles.Add(vertices.Count);
            triangles.Add(vertices.Count + 1);
            triangles.Add(vertices.Count + 2);

            // Add the vertices
            vertices.Add(v0);
            vertices.Add(v1);
            vertices.Add(v2);

            // Compute the normal - flat shaded, so the vertices all have the same normal
            Vector3 normal = Vector3.Cross(v1 - v0, v2 - v0);
            normals.Add(normal);
            normals.Add(normal);
            normals.Add(normal);

            // If you want to texture your terrain, UVs are important,
            // but I just use a flat color so put in dummy coords
            uvs.Add(new Vector2(0.0f, 0.0f));
            uvs.Add(new Vector2(0.0f, 0.0f));
            uvs.Add(new Vector2(0.0f, 0.0f));
        }

        // Create the actual Unity mesh object
        Mesh chunkMesh = new Mesh();
        chunkMesh.vertices = vertices.ToArray();
        chunkMesh.uv = uvs.ToArray();
        chunkMesh.triangles = triangles.ToArray();
        chunkMesh.normals = normals.ToArray();

        // Instantiate the GameObject which will display this chunk
        Transform chunk = Instantiate<Transform>(chunkPrefab, transform.position, transform.rotation);
        chunk.GetComponent<MeshFilter>().mesh = chunkMesh;
        chunk.GetComponent<MeshCollider>().sharedMesh = chunkMesh;
        chunk.transform.parent = transform;
    }
}

// This method returns the world-space vertex for a given vertex index
public Vector3 GetPoint3D(int index) {
    Vertex vertex = mesh.vertices[index];
    float elevation = elevations[index];
    return new Vector3((float)vertex.x, elevation, (float)vertex.y);
}
To use the code above, you’ll need a chunk prefab which is just an empty gameObject with mesh filter and mesh collider components added. I do this rather than creating the entire game object in code so that I can set the material in the inspector.
If you attach this script to an empty gameObject and run the scene, it’ll generate basically a flat plane - not very exciting. That’s because perlin noise generates elevations between 0 and 1, which is hardly noticeable on the scales we’re generating the terrain at. Bump up the chunk prefab’s y-scale to 100, and you’ll get something like this:
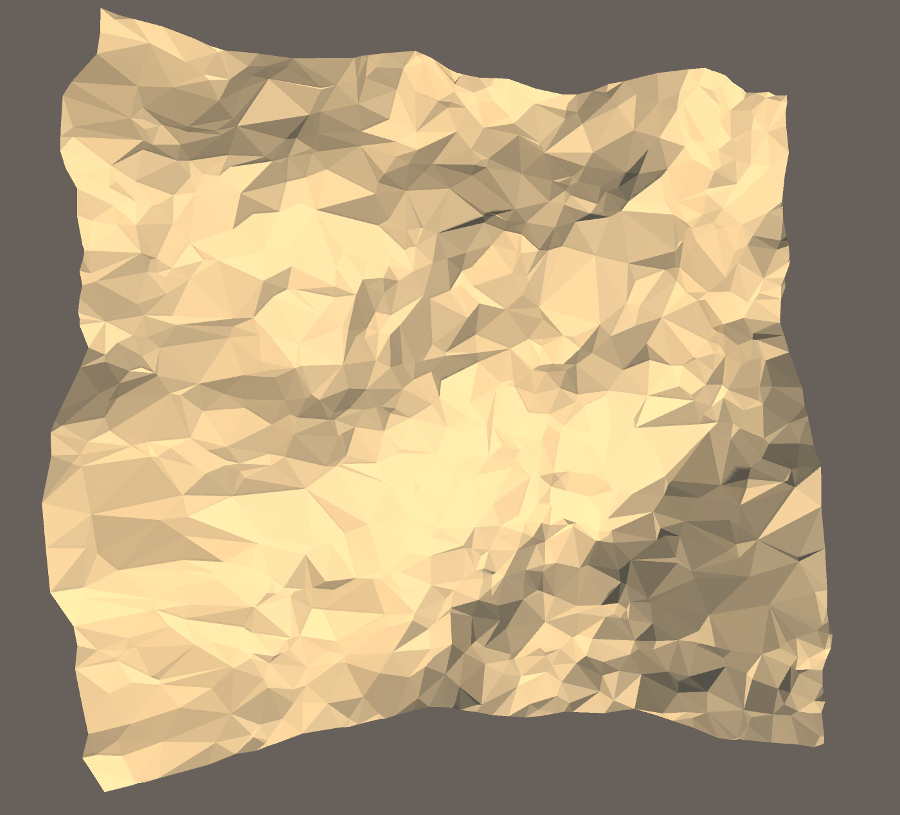
As you can see, the delaunay triangulation generates a mesh which is reminiscent of a piece of paper that’s been folded many times - way more interesting than the standard grid-based perlin noise.
Let’s get one more picture of the result, on a larger scale:
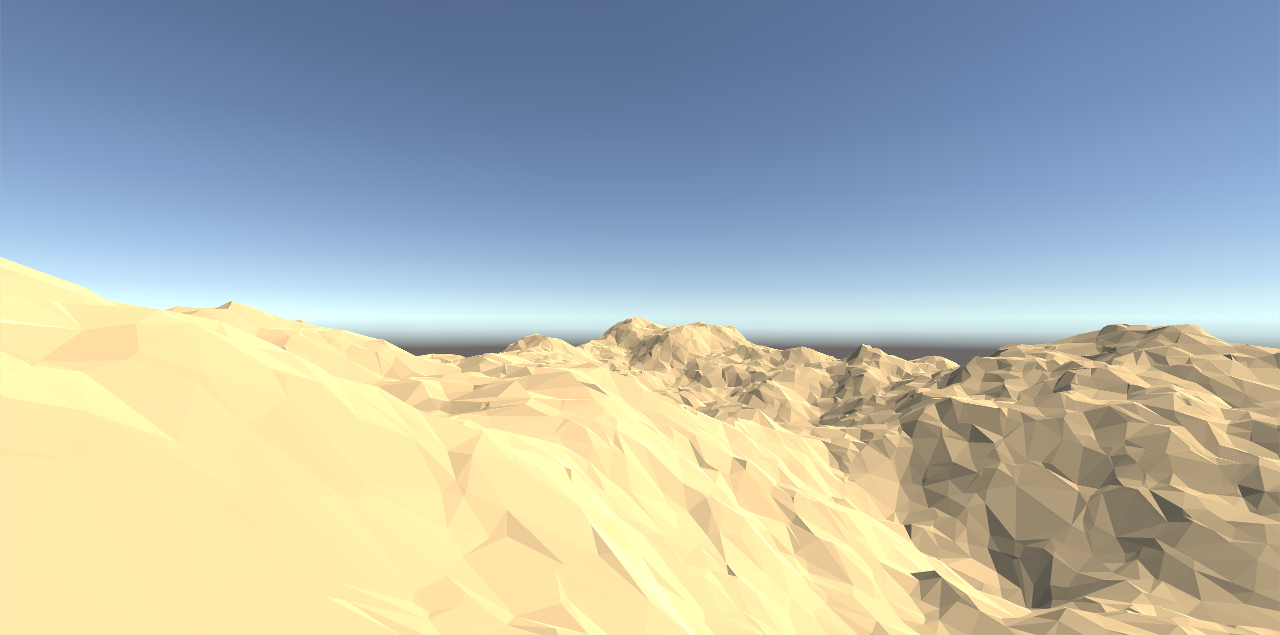
The mesh still looks a little bland from this angle, but that’s because perlin noise alone doesn’t really produce interesting results. You’ll want to add local scaling and other terrain features to really spice it up. I’ll talk about a couple of the things I did to get that spice in the next post.