This is the third post in a series about the tech we used to put together Rift Core. If you aren’t familiar with Rift Core, you can check it out here. It’s an action RTS game about a squad of mechs who are desperately trying to save their world.
In this post, I’ll cover one of the more elaborate VFX we built for Rift Core: the shield. There’s several components in the shield effect which all add up to the final result. I’ll cover each one in detail.
In order of complexity, the parts are:
- A faceted “bubble” around each mech
- A hex cell overlay on the mechs’ geometry
- A decal indicating area of effect
Faceted bubble
We started with this piece of geometry that looks a bit like a stone egg:
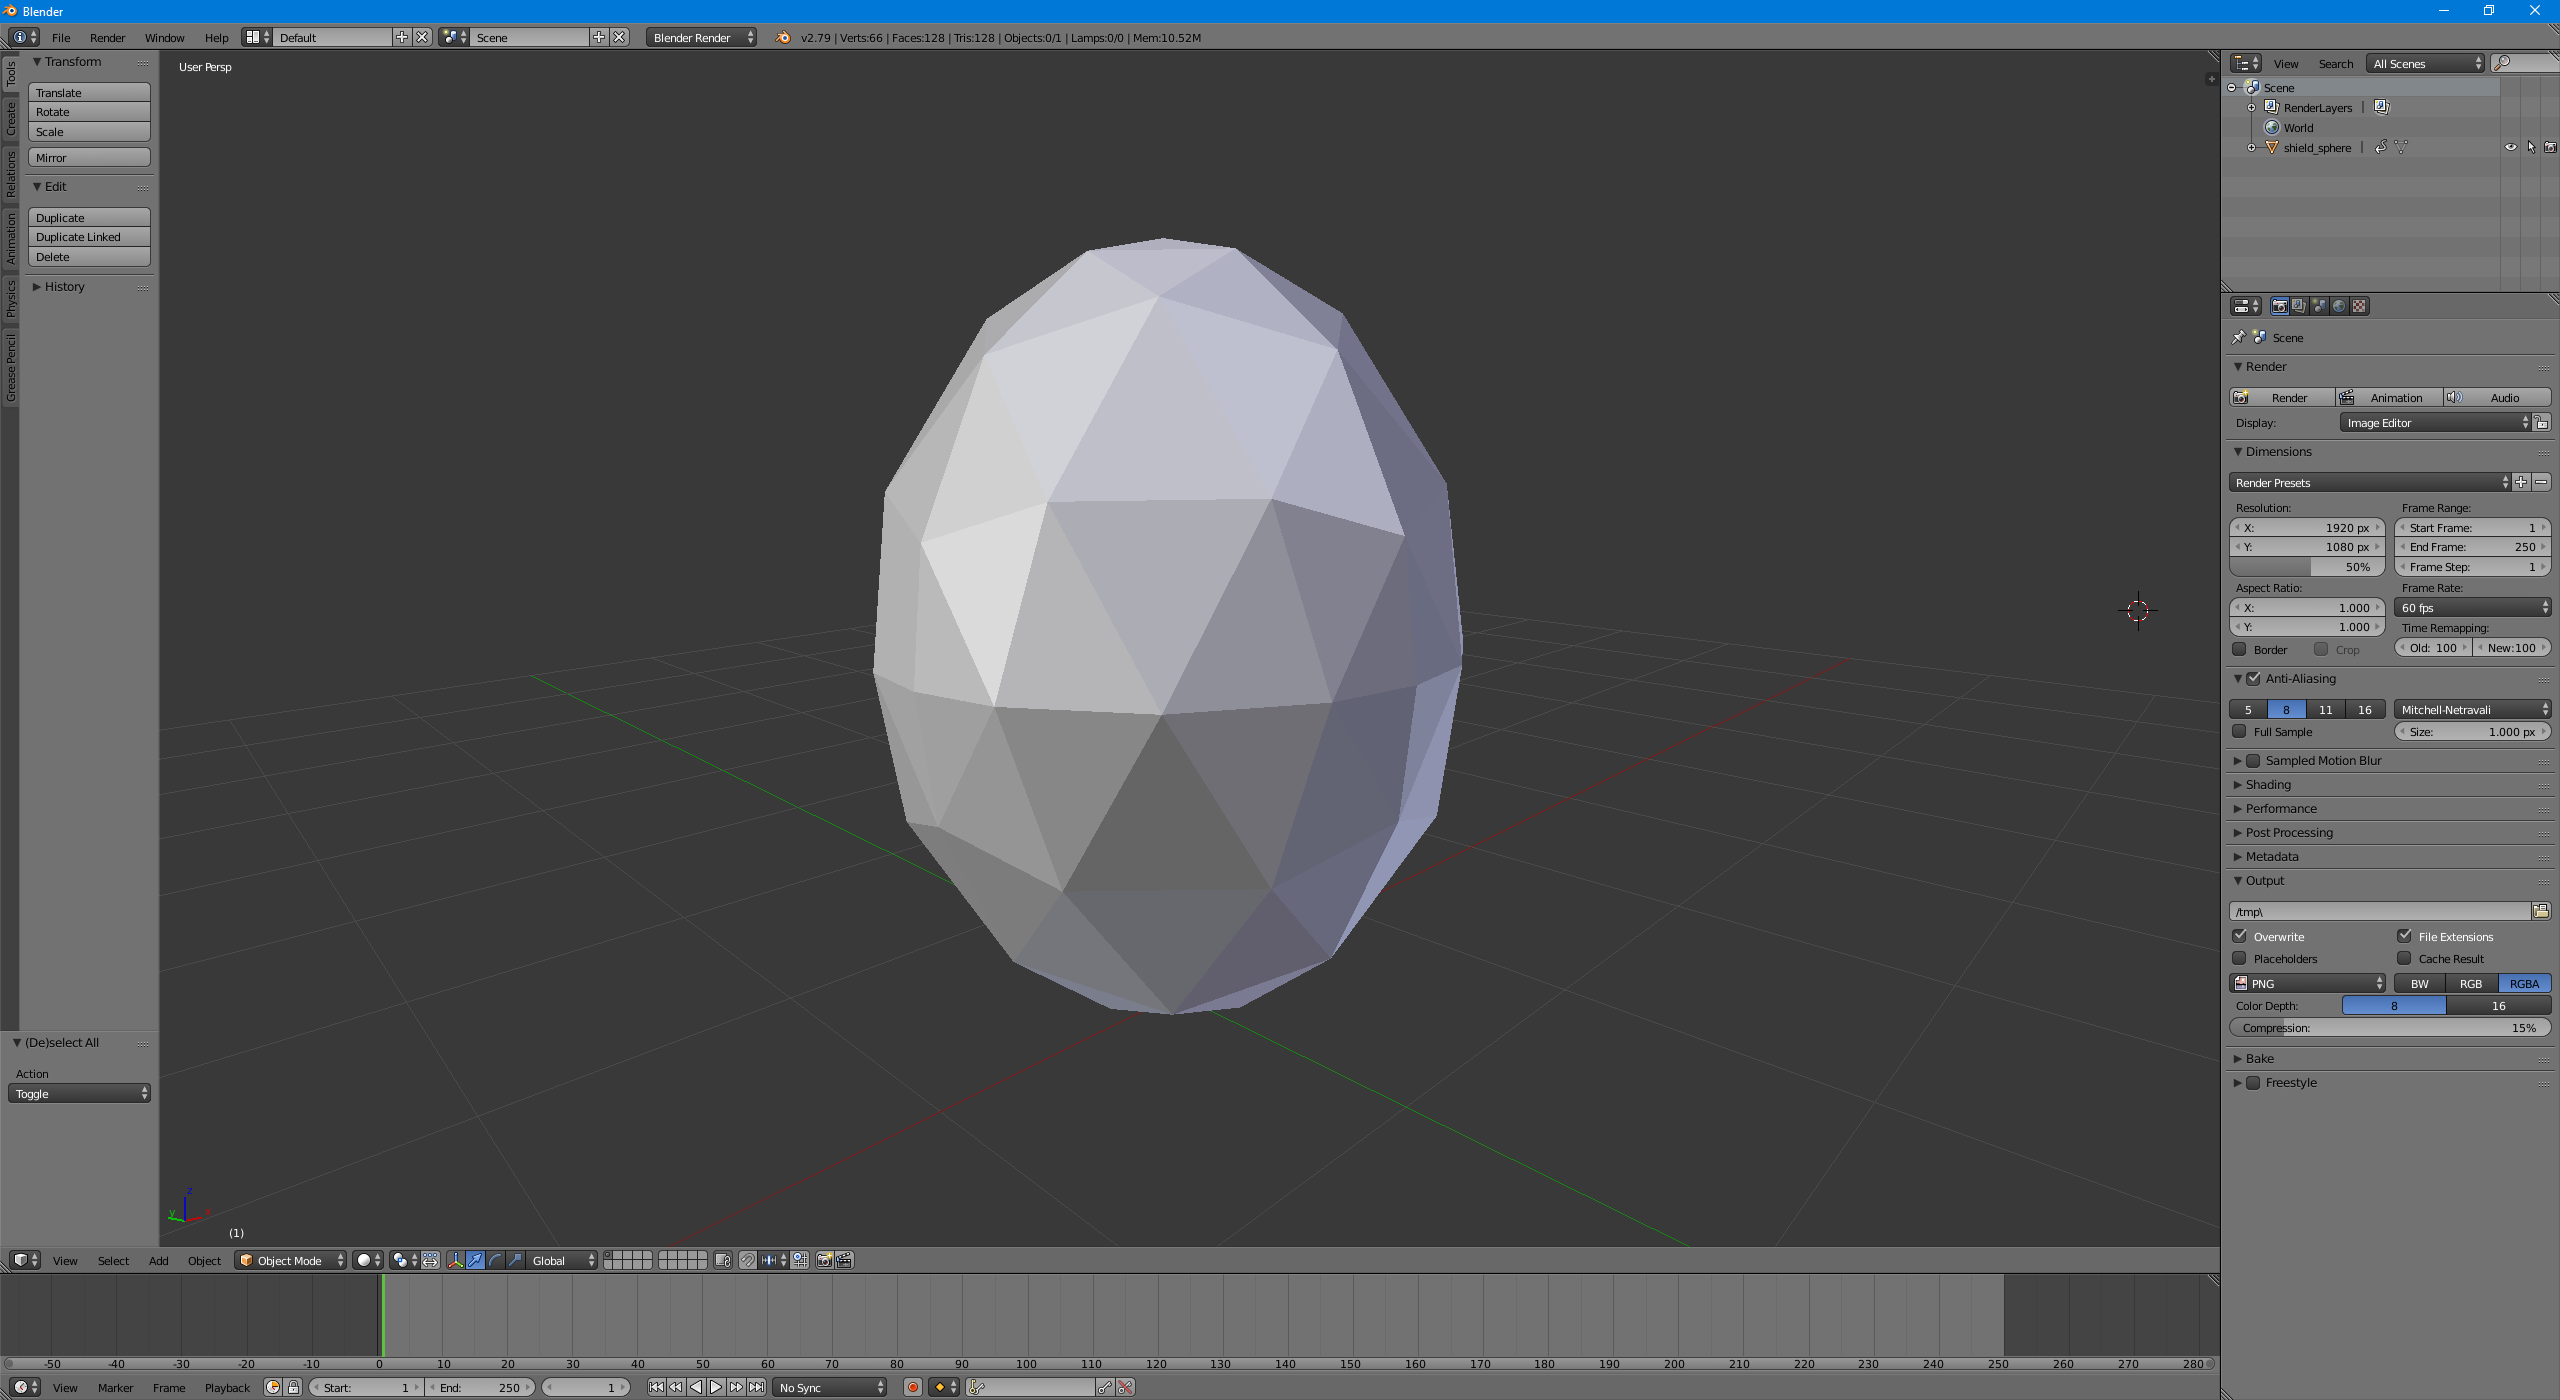
On this geometry, we apply a rimlight shader in Unity. When a unit becomes invincible, we quickly fade the rim power from 0 to 1.
In addition, we added a script which rotates the bubble slowly around the Y axis. Since the rimlight depends on the view direction, the unit is always kept in view.
Mech overlay
This effect is a bit subtle. If you watch the first video of all the shield effects together, you might notice that a blue hex overlay is applied on top of each mech. Here is a video showing that effect in isolation:
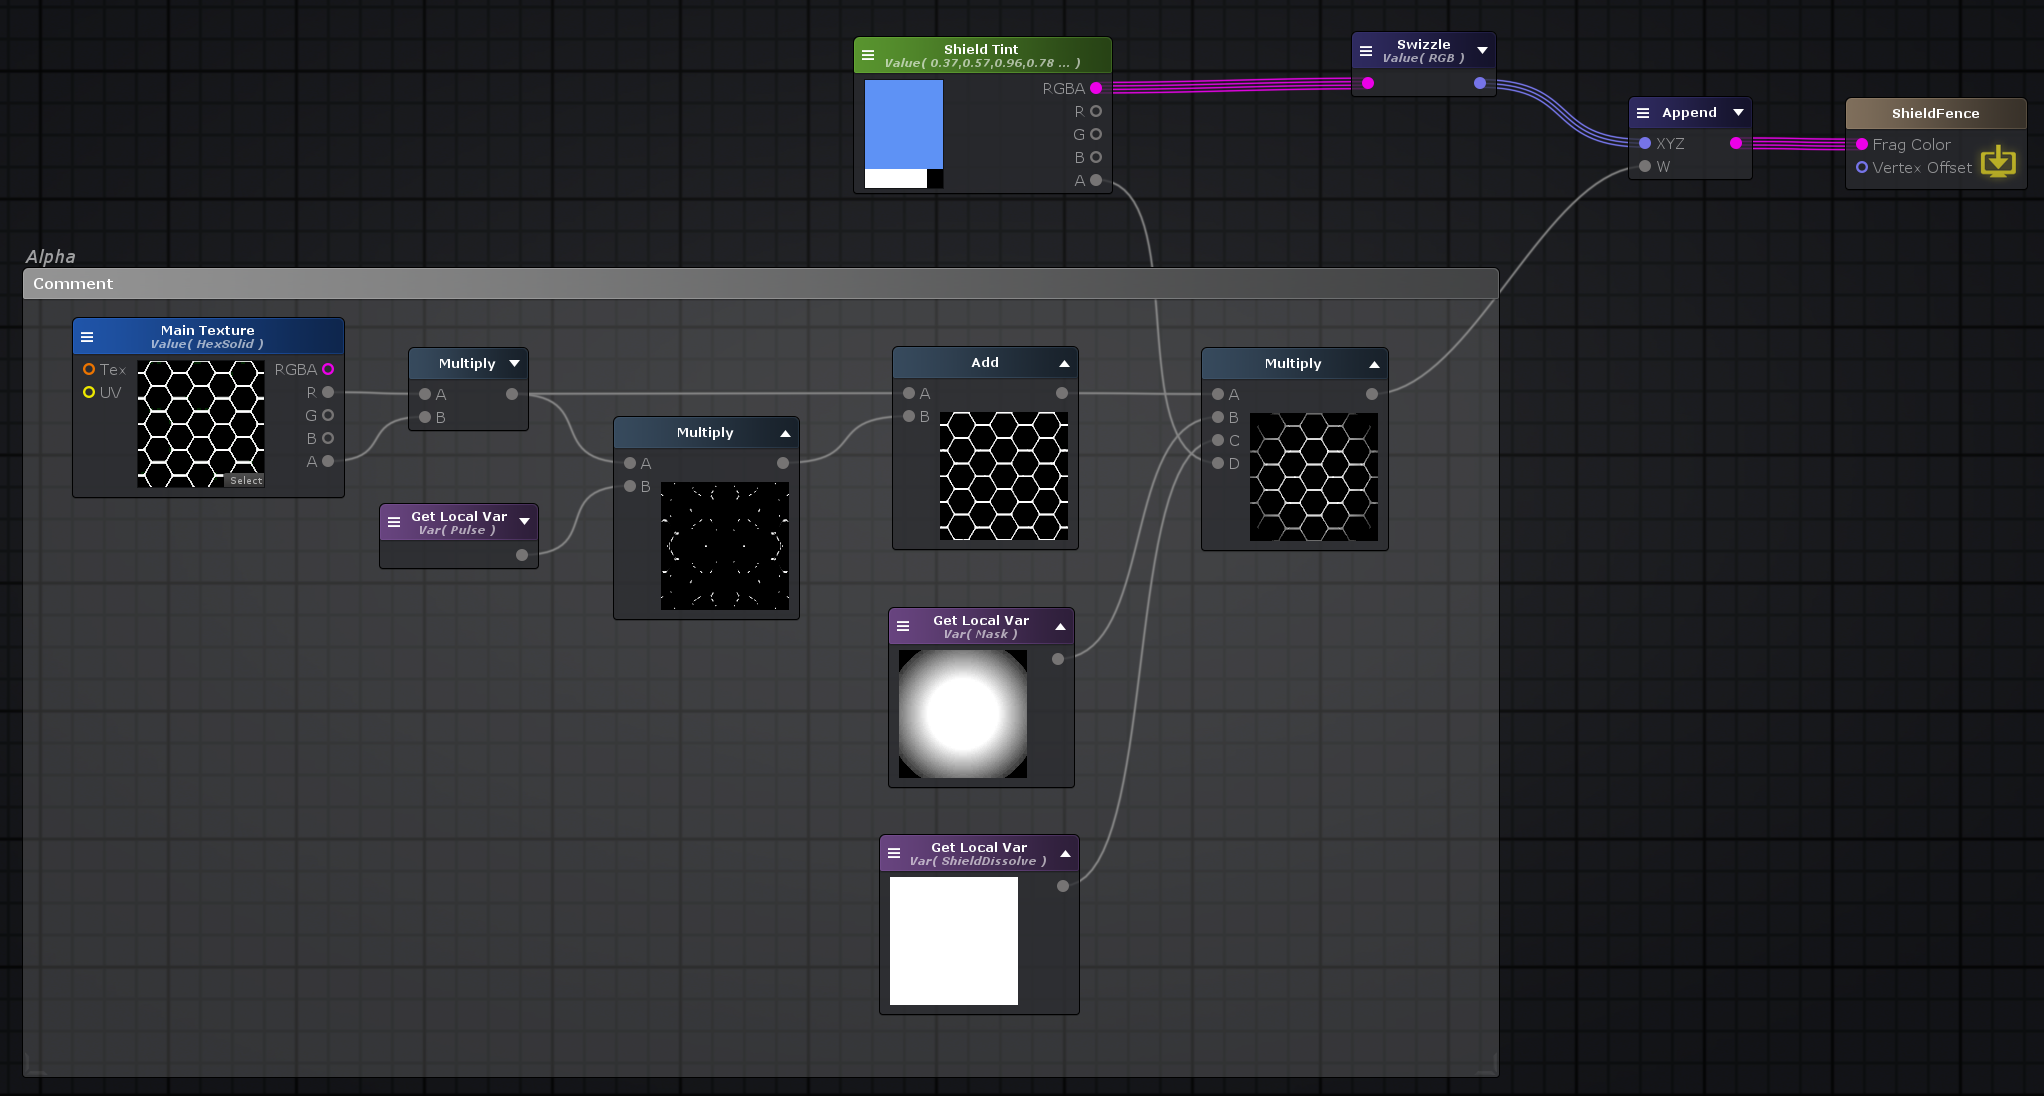
To implement this, we replaced the shader on the mech’s materials. I used Amplify Shader Editor, a node-based shader editor, to author this shader. Here’s the full shader graph:
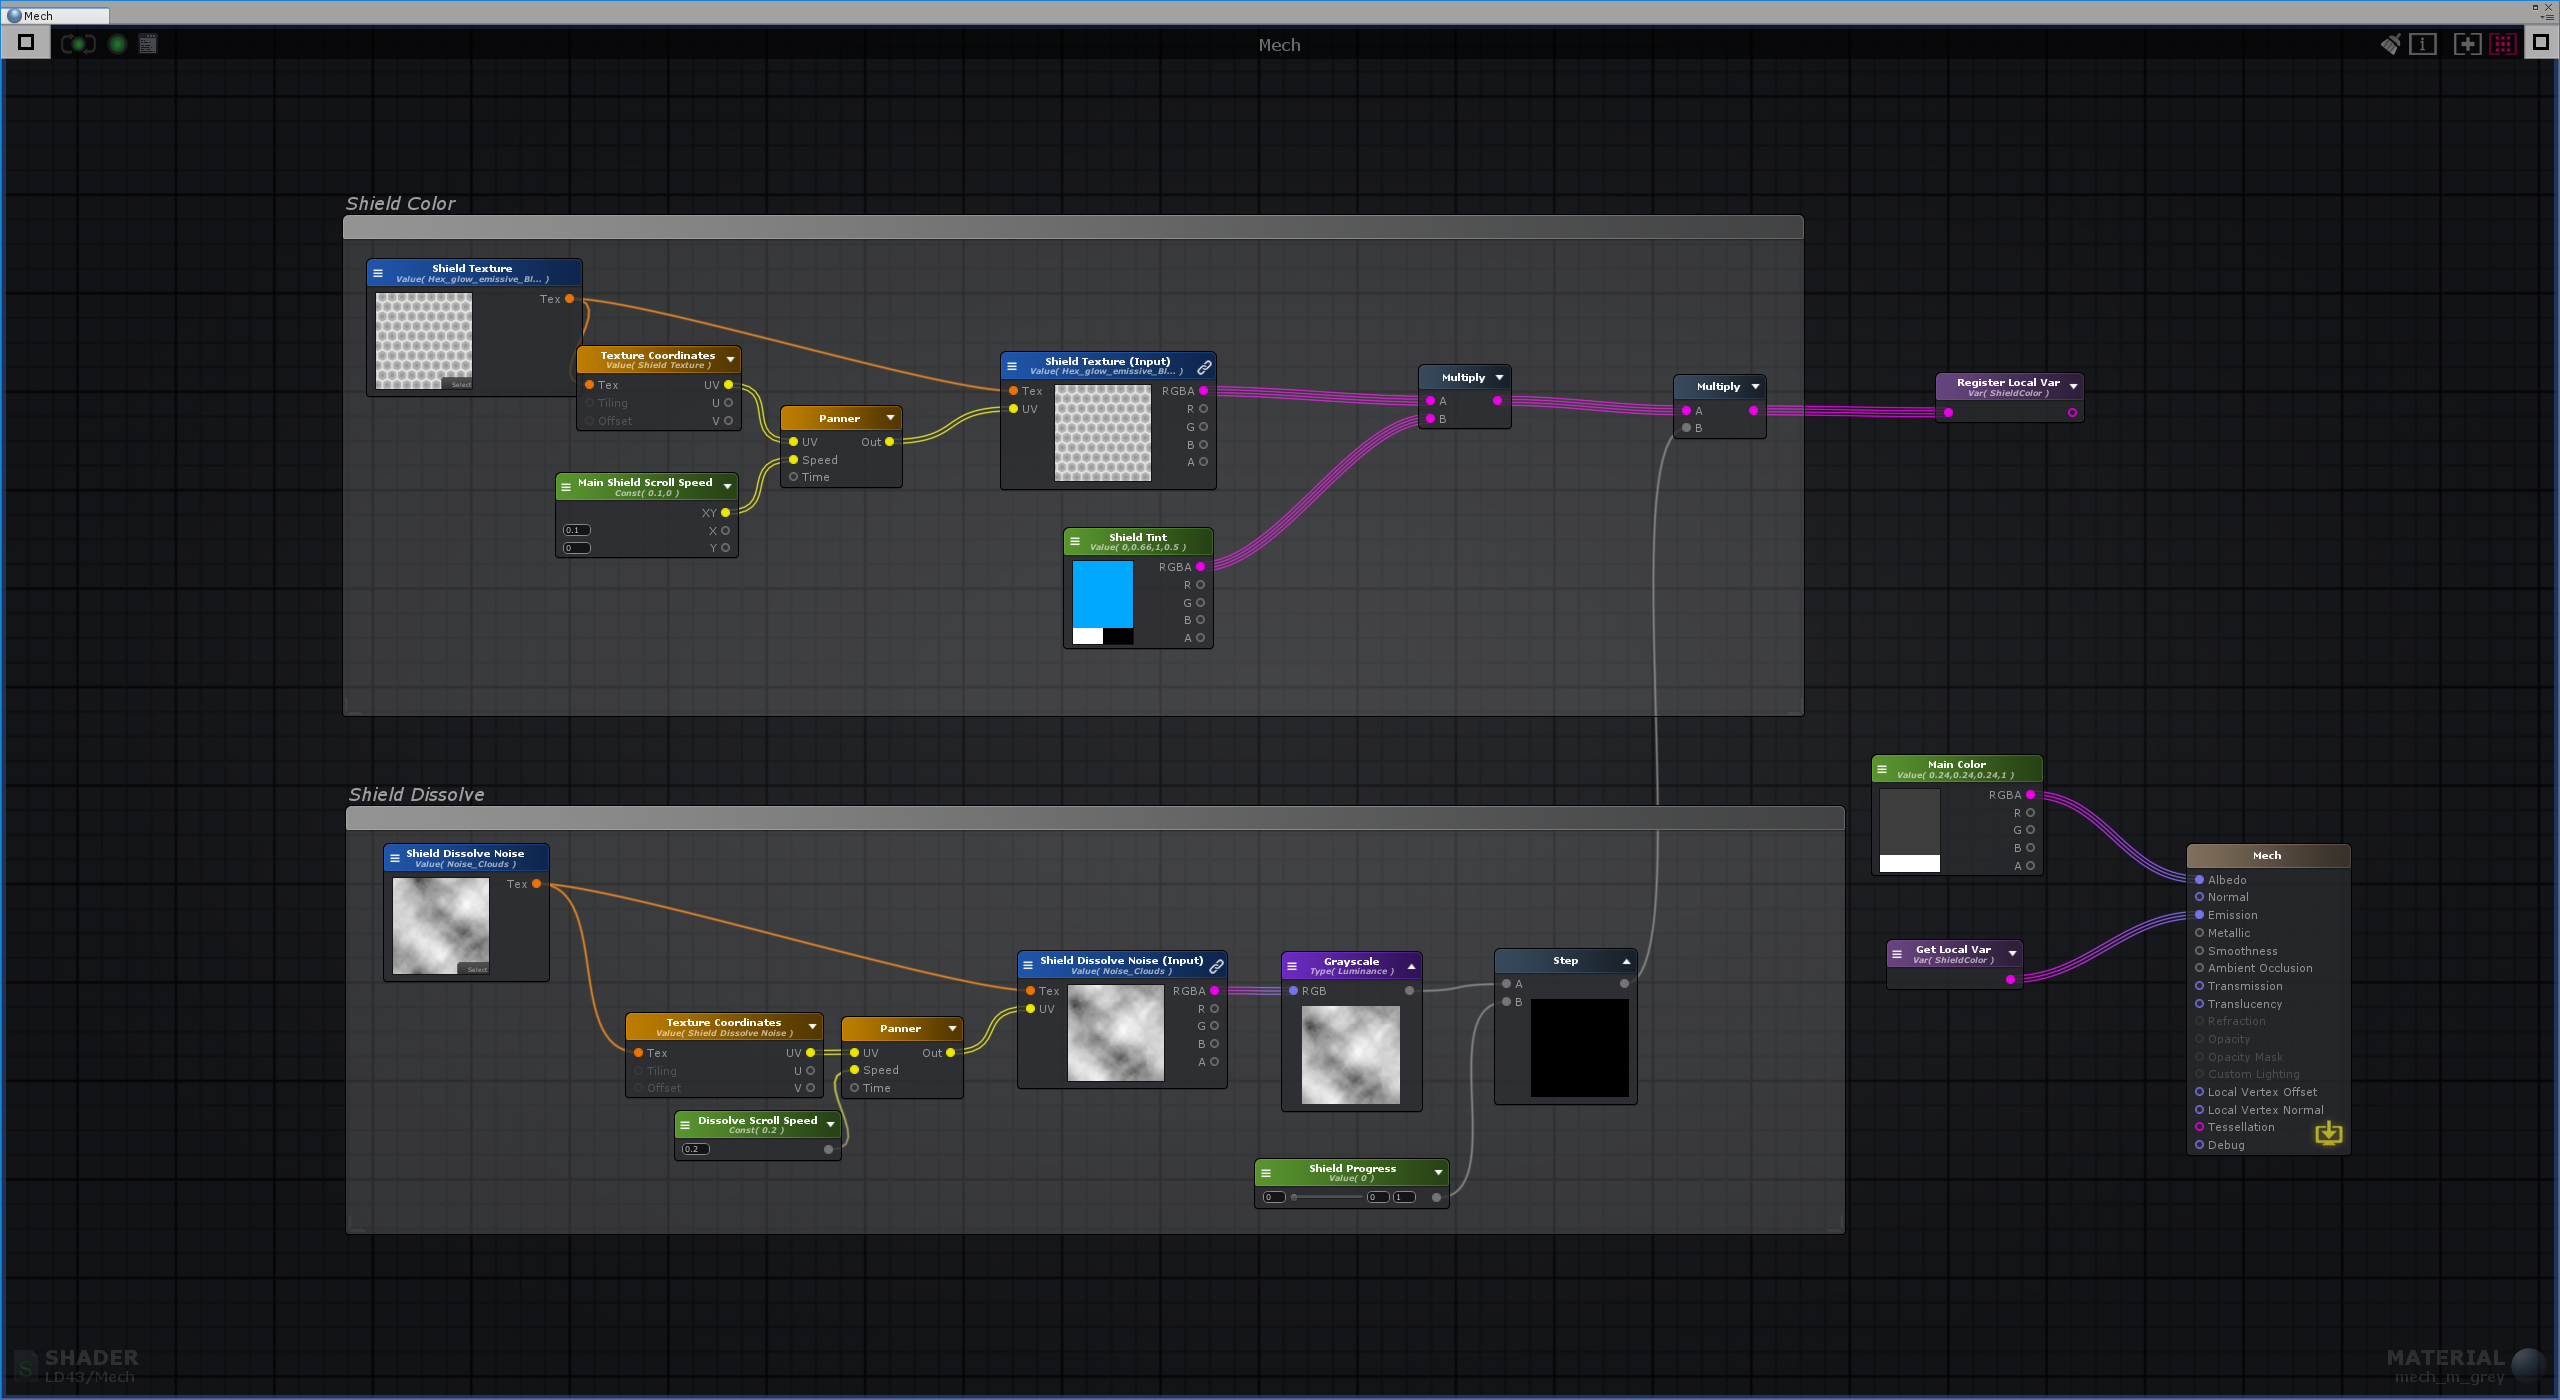
The shader is fairly simple. Let’s break it down.
Dissolve
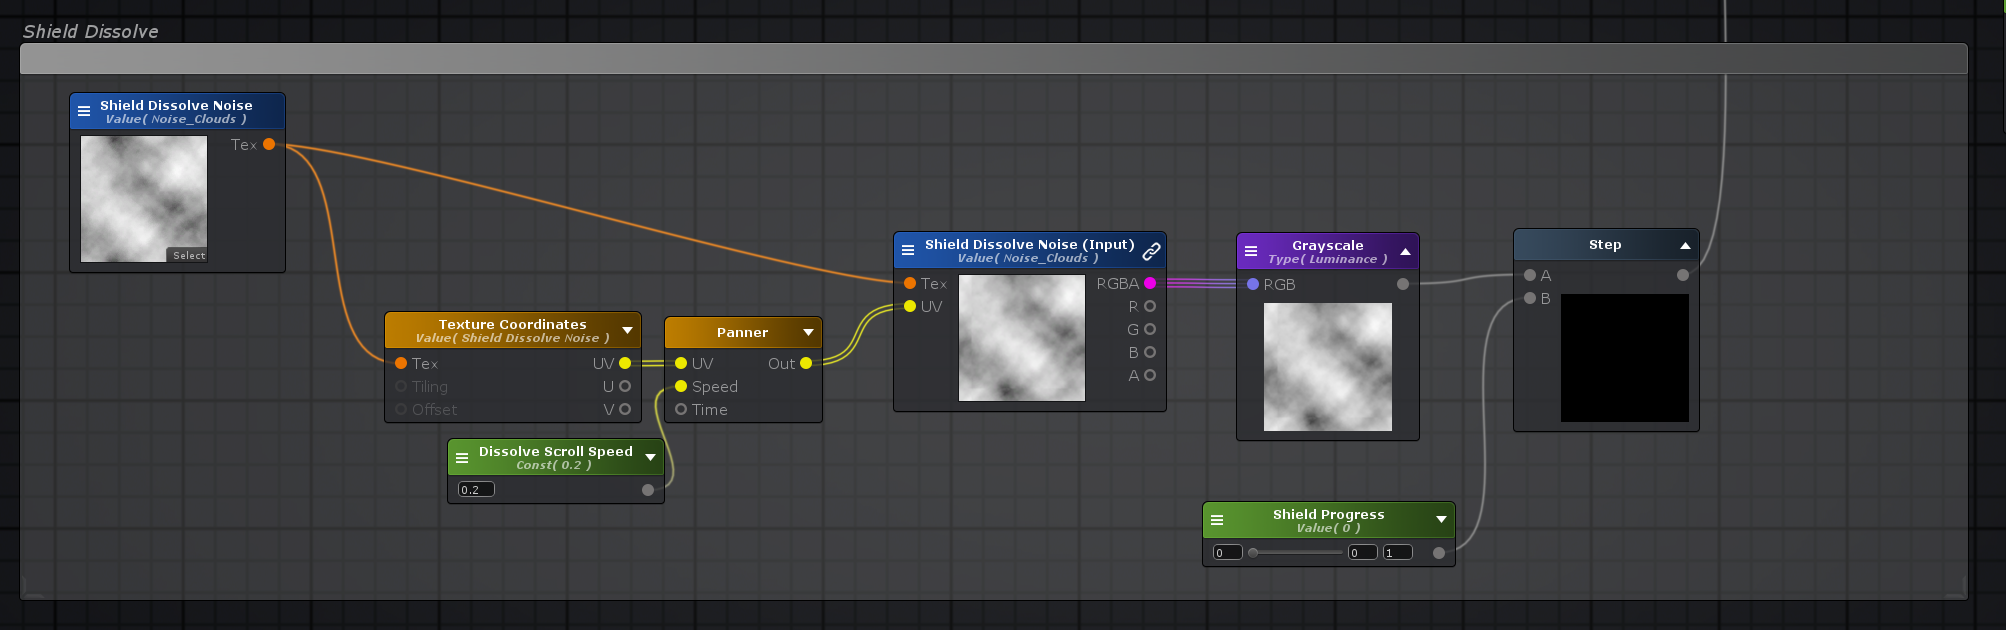
This dissolve is how we “fade in” the effect. The base of the dissolve is a cloud texture. We scroll the UVs used to sample the texture to give it some dynamism. Then, we use the step function, which outputs 1 when A < B. In this case, A is the texture value and B is an input parameter, “Shield Progress”, which is interpolated from 0 to 1 in script when the unit becomes invincible.
Shield Color
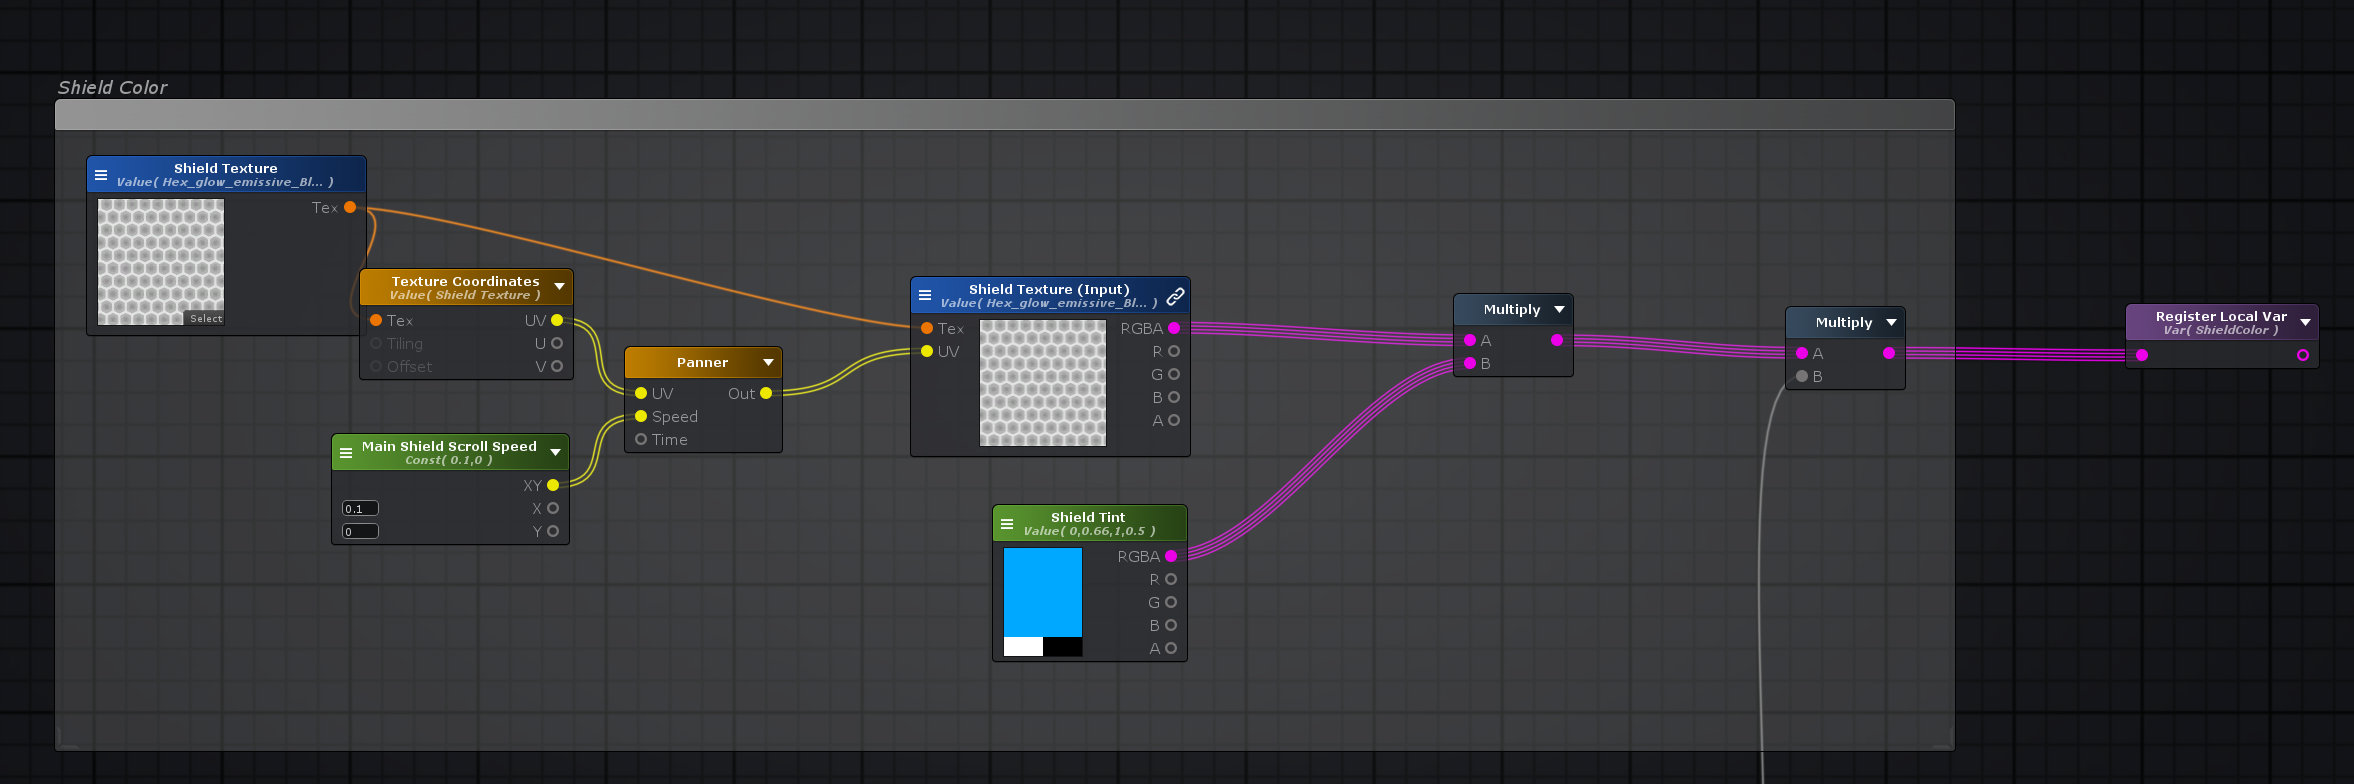
The main texture we use to color the shield overlay is a hex grid with some glow, which is sampled with a scrolling UV. Then, we tint the shield color blue by multiplying the output of the texture with an input color.
The last multiply node on the right multiplies the final color with the output of the dissolve (which is the B input) to fade in the overlay. That value is output to a local variable to keep things neat - we’ll use it in the next step.
Output
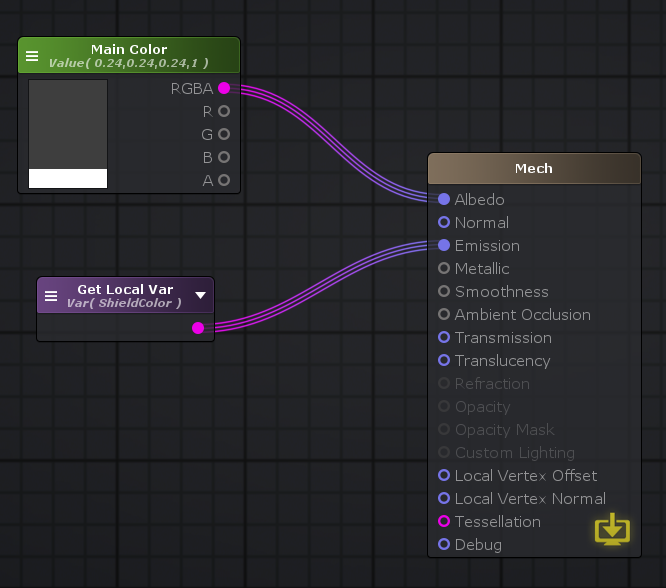
Remember that this shader is used as the main mech material. That means the shader is doing double duty - it also displays the base white, blue, or grey color of the mech.
That base color is input through the main color property. All our mechs are flat-shaded, so all we need to do with that color is put it straight into the albedo output. Our shield overlay color, which we output into a local variable in the previous step, is put through the emissive channel so it appears to glow.
Here’s the final effect again:
Shield range decal
The player can now tell at a glance which mechs are shielded and which aren’t. However, we still need to show the player where the area of effect is. For that, we created this range decal.
For an overview of how we projected this decal onto the ground, see the previous blog post.
The decal geometry consists of two pieces:

The inner circle (above) is a flattened cylinder with UVs mapped squarely onto the sheet.
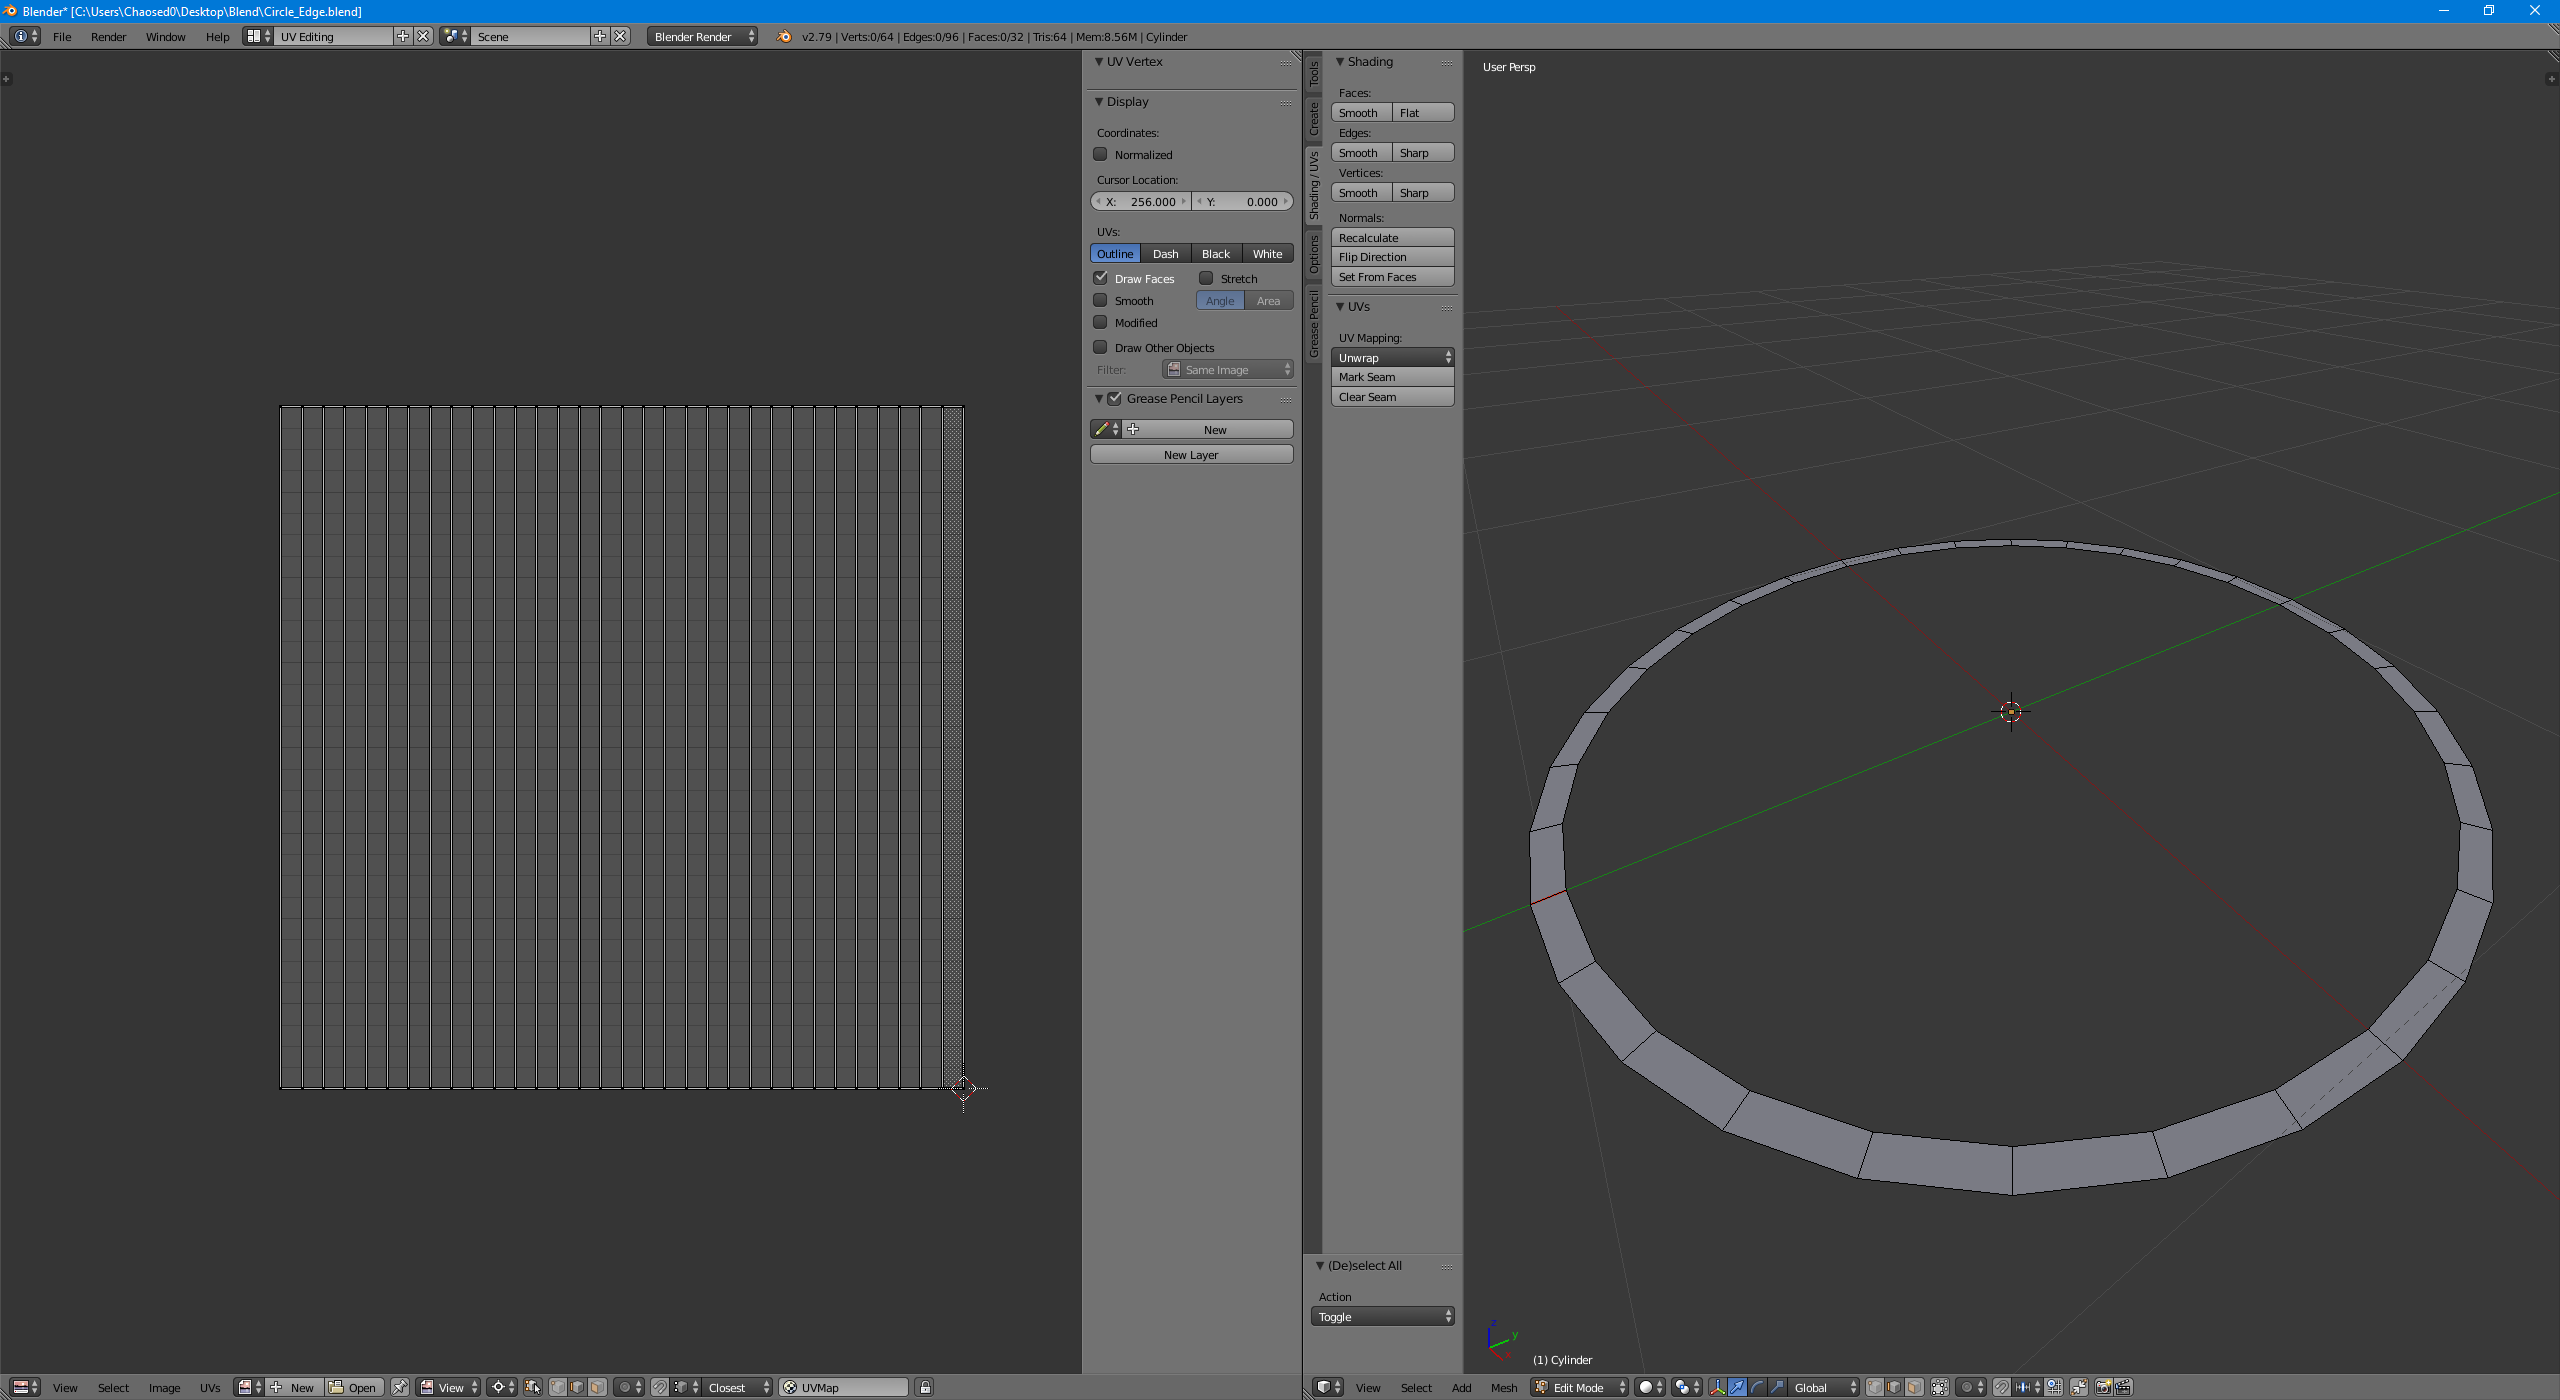
The outer circle outline has the same radius as the inner circle. Its UVs are mapped in polar space; that is, any texture that scrolls along the X axis will scroll around the circle, and any texture that scrolls on the Y axis scrolls along the radius of the circle.
Both pieces of geometry use the same shader internally. Here is the Amplify shader graph for the shader:
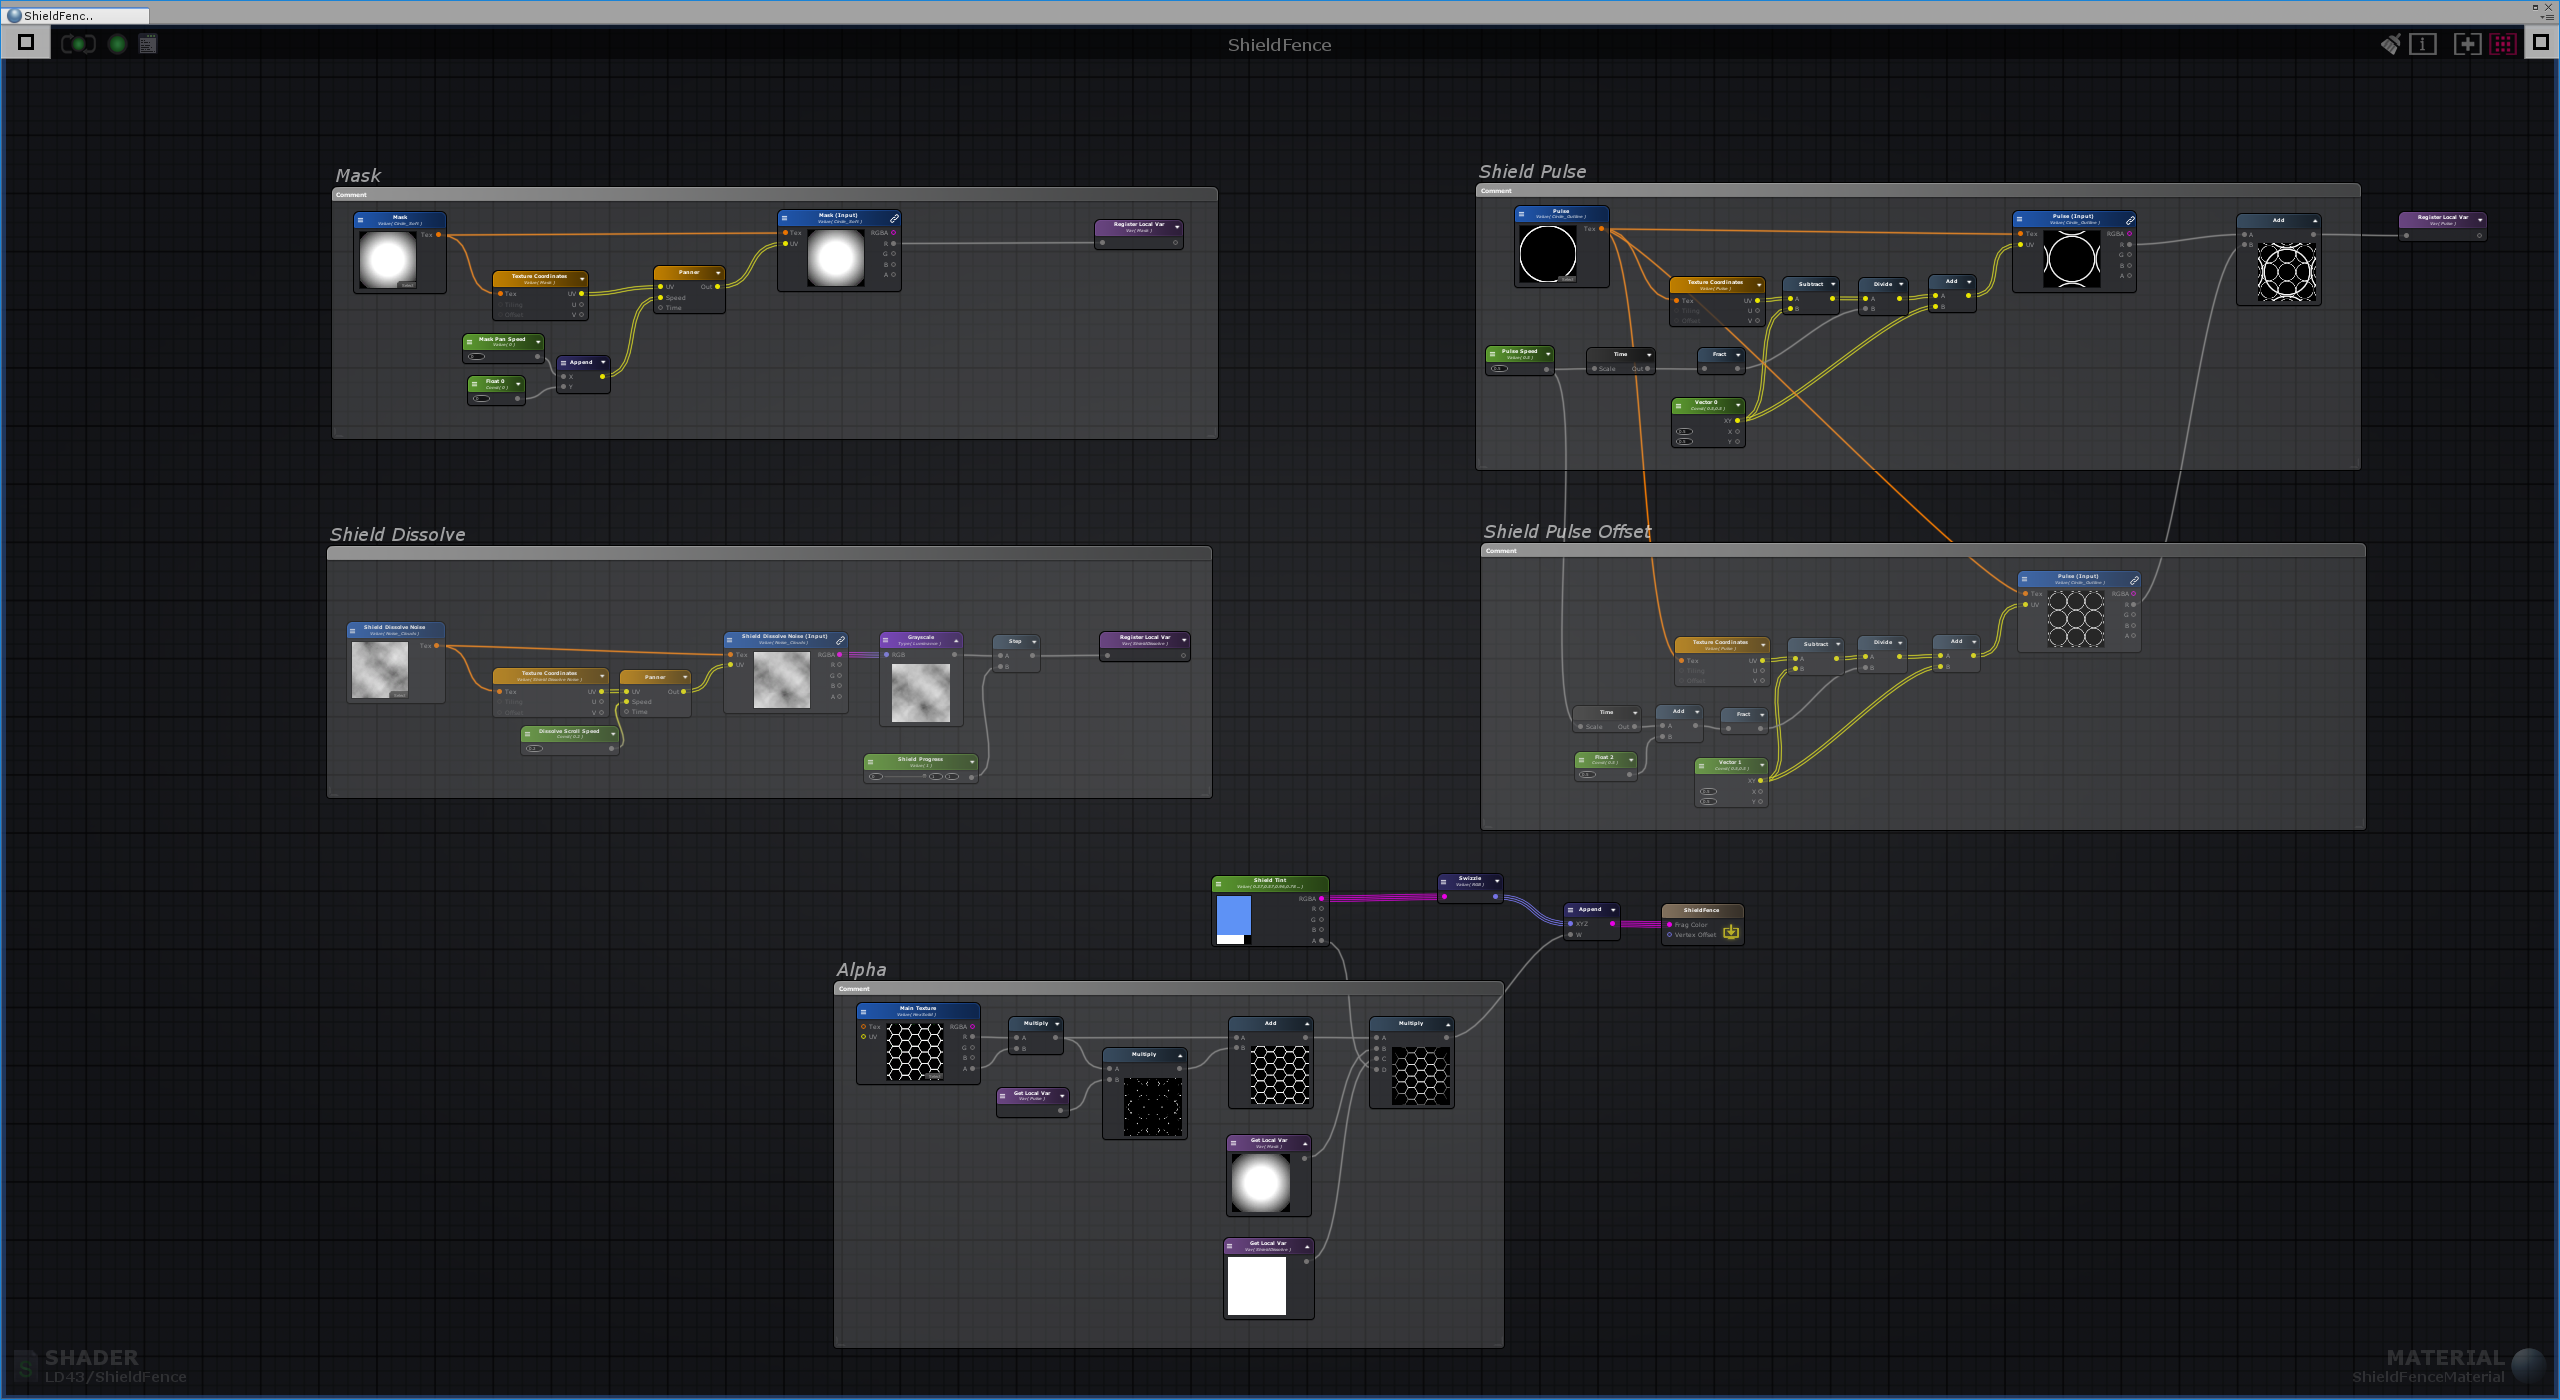
Let’s break down some of the pieces of this graph.
Pulse

This is the portion of the shader dedicated to achieving the “pulsing” effect on the inside of the shield. The pulse is simply a circle that starts at 0 radius, grows over time until it reaches the edges of the UV space, and then loops back and does it again.
The input texture is an outline of a circle. The nodes that follow use math to achieve the looping and scaling; I’ll cover them from left to right.
Before we scale the circle, we offset the UV by (-0.5, -0.5). Otherwise, when we do the scaling, the circle will be scaled from the top-left instead of from the center.
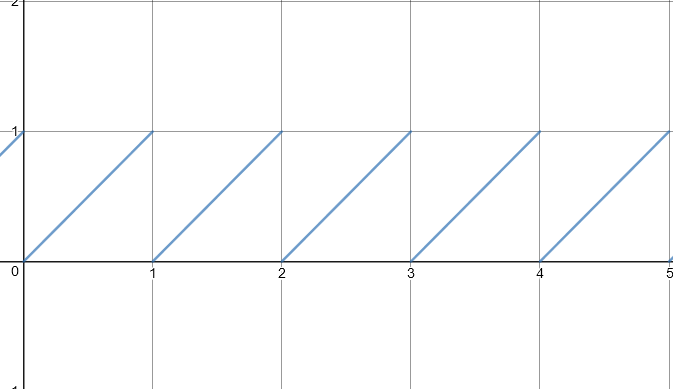
To achieve the loop, we pass the time (scaled by the desired speed of the effect) through a fract node. This outputs the fractional part of the time between 0 and 1, meaning that whenever the time passes to the next whole number, the output loops back to 0. The graph of this value looks like a sawtooth:
We then divide the offset UV value by our fractional time value to scale the circle. (Why divide? Remember that we are actually scaling the UVs, not the circle.)
To re-center our coordinate back to the correct space, we add (0.5, 0.5) to the resulting scaled coordinate, reversing our earlier offset. Finally, we sample the circle at that coordinate, resulting in a circle that grows over time.
The final add node is adding a second offset pulse so that there’s two pulses at any given time. All I’ve done to obtain that second pulse is copy the pulse graph above and add 0.5 to the time.
If we output just this portion of the shader graph, we have two growing circles, as expected.
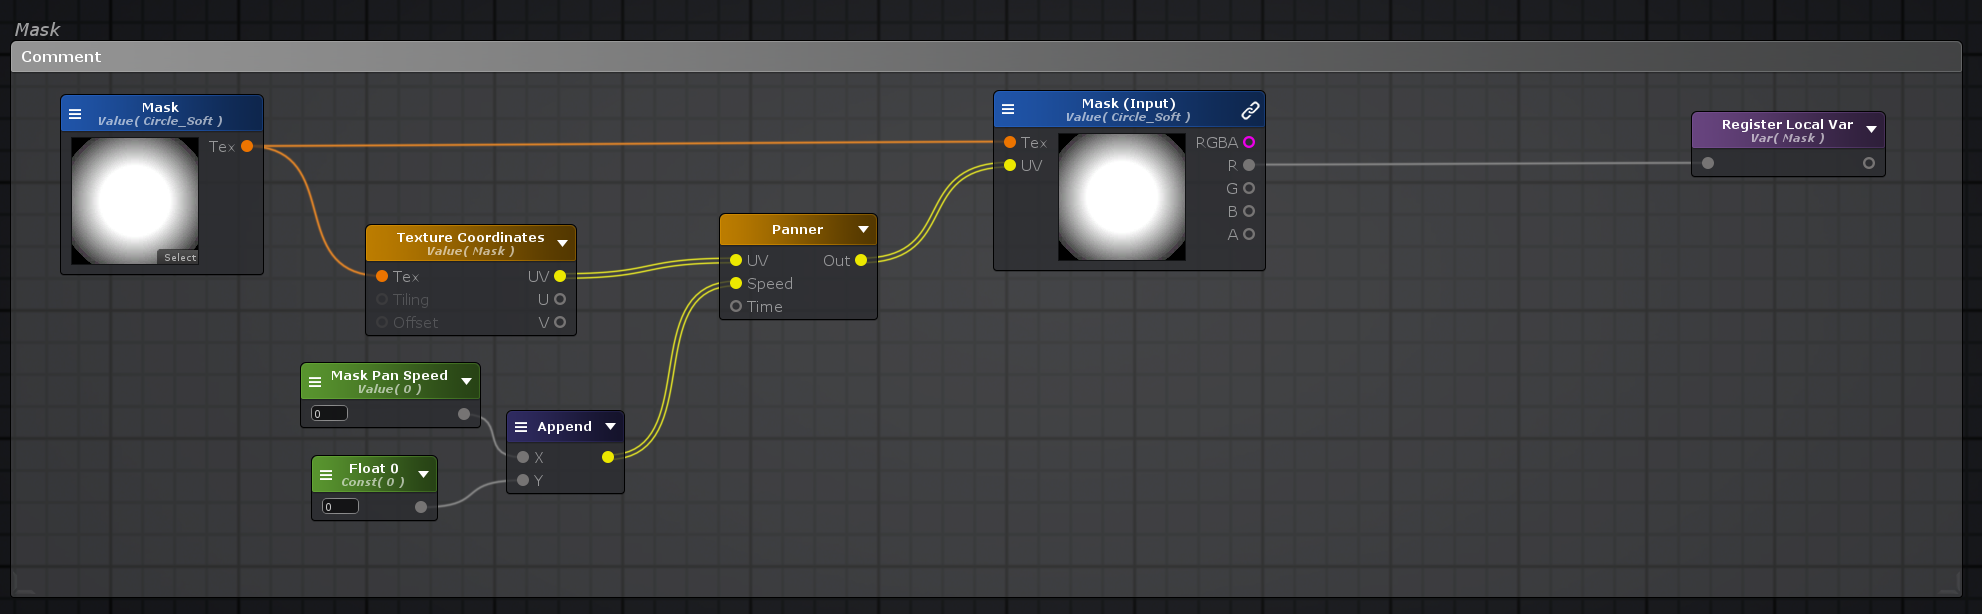
Compositing
To make the pulse appear as if it’s going “through” the hex grid, we use a simple trick:
- Make the hex grid slightly transparent by default
- Mask the pulse using the hex grid texture (multiply them) and add the result to the alpha of the hex grid
Here’s the result:
You may have noticed that there’s another mask in the graph above, the feathered circle. This extra mask makes the inner pattern fade towards the edges. With that mask, we get the final inner decal effect:
Circle outline
The circle outline uses the same shader as the inner part of the circle. This was mainly out of convenience because they share some properties.
The circle outline does not use the pulse component of the shader; the pulse speed is turned to 0 in its material. Instead, we rotate the circle by scrolling the mask’s UVs in the shader (something we don’t do in the inner circle’s material). Here’s what the shader graph for that looks like:
Instead of the feathered circle, we feed the edge this “laser” texture as the mask texture:

We set this mask to tile four times, resulting in an outline with four segments - a bit more visually interesting than a solid border.
Then, we apply the same blue tint, as well as another mask in the main texture slot to make the line thinner and just a bit feathered in the other dimension, giving us our final result:
Expiry blink
You may have noticed one additional component of this effect which I haven’t covered yet: the shield “blinks” several times just before expiring. This lets the player know that their mechs are in imminent danger.
We already have all the shader pieces to achieve this effect. We can use a normal Unity animation for this. First, though, we need a way to modify the shader color through a component property. I created a component called ModifyColor which has a public color property. Every LateUpdate, it passes this color to the shield material through a MaterialPropertyBlock.
Once we have this component, all we need to do is create a Unity animation which animates this color property, and play it through script at an appropriate time.
Conclusion
Once again, here’s the final effect:
We think these shield effects simultaneously look pretty cool and also achieve several gameplay goals:
- The player can tell exactly where the boundary of the shield is.
- The player can see, at a glance, what mechs are shielded and which ones aren’t.
- The player knows when the shield effect is about to expire so they can take appropriate action.
Still, this is one of my first forays into VFX. If you noticed any rookie mistakes, please leave a comment.
Huge thanks to Jason Keyser for creating his VFX breakdowns. I never would have gotten even this far without them.